Preparations for Colt Starting: Control the horses gaits Part II [Video]
This is the third article with a detailed explanation of the “14 Preparations for a safe and respectful Colt Starting”.
To understand the whole concept behind it I recommend to read “14 Preparations for a safe and respectful Colt Starting” first.
In “Preparations for Colt Starting: Control the horses' gaits Part I” I explained two dynamic exercises.
Now it is about three static exercises which will help the horse to understand us better when riding.
These exercises prepare the horse for all downwards transitions as well as stopping.
When I start a horse, I want to have several communications available about slowing down and stopping.
Each horse needs to learn them all, but each horse will respond best to one or two of them.
To stop a horse has two main components:
- relax your energy and stop within your seat
- use the reins in some way if needed
When we use the reins, the horse will have a tendency to want to defend himself during the first few rides.
This is why I like to teach the following 3 exercises on the ground before I ride the horse for the first time.
This is especially important when starting horses bitless, but of course, it should also be done when starting a horse with a bit.
Material needed:
All you need to teach this 3 exercises are a halter and a lead rope. And patient persistence :-)
Exercise # 5: Backing up through pressure on the nose
The better the horse knows to back up, the better it will do everything else.
If you can back up your horse easily, you will have big chances that stopping will be easy as well.
Whenever we tighten both reins and the horse feels pressure on his nose, chances are big that he will feel claustrophobic.
The natural reflex of a horse would be to run forwards.
Horses don’t think backwards by nature. We need to explain to our horses that there is another way of responding.
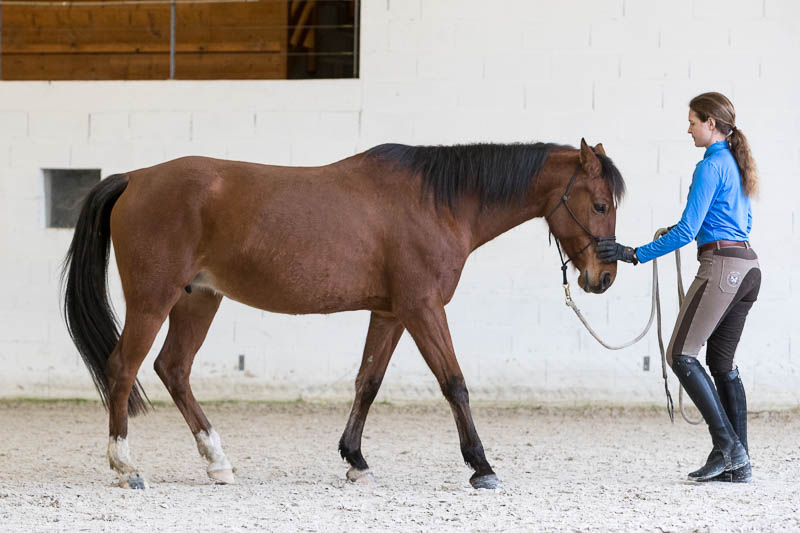
Objective:
You can ask your horse to yield backwards by applying pressure with your hand (ideally not more than 50 g) on the back of his nose.
Your horse backs up willingly for 10 steps with a diagonal footfall.
Benefits:
Your horse learns to understand the action of the reins and is well prepared to understand you when riding.
How to teach it to your horse:
Do this exercise when your horse is calm and connected to you.
When your horse is still excited or distracted, it will be a lot harder to convince your horse to go backwards.
Stand right in front of your horse. Place your hand on the back of his nose and rub.
Raise your energy and start to apply pressure with your thumb and index finger.
Phase 1 should be as light as you would like your horse to respond one day.
- just touch the hair - like a fly
- touch the skin - like a horse fly
- double the pressure you used in phase 2
- double the pressure you used in phase 3
Release and rub as soon as your horse responds or even just shifts the weight at first.
Gradually ask for more steps when your horse starts to understand.
When backing up your horse for several steps, always go back to phase 1 when your horse responds softly.
Increase your phases when your horse gets stuck or resistant.
Go back to a lower phase as soon your horse gets unstuck.
Rub and reward when you get a few soft steps in a row.
What if:
Your horse lifts the head very high or lowers it to the ground - he tries to escape from your hand
Leave your hand resting on your horse's nose and follow all movements.
As soon as your horse keeps still, rub and remove your hand. Then start again.
Soon your horse’s confidence and acceptance will grow as he realizes that only by holding still, you will take your hand off.
Challenges:
Can you:
- back your horse through an L shape corridor
- back your horse in a slalom
- back your horse slow and fast
Exercise # 6: The Tea-Bag Back up
When we start a horse in a simple knot halter we have to consider that they are designed for riding with loose reins.
By teaching the horse to back up by rhythmic pressure, it prepares him well to understand all downwards transitions, stopping and backing up while using one rein.
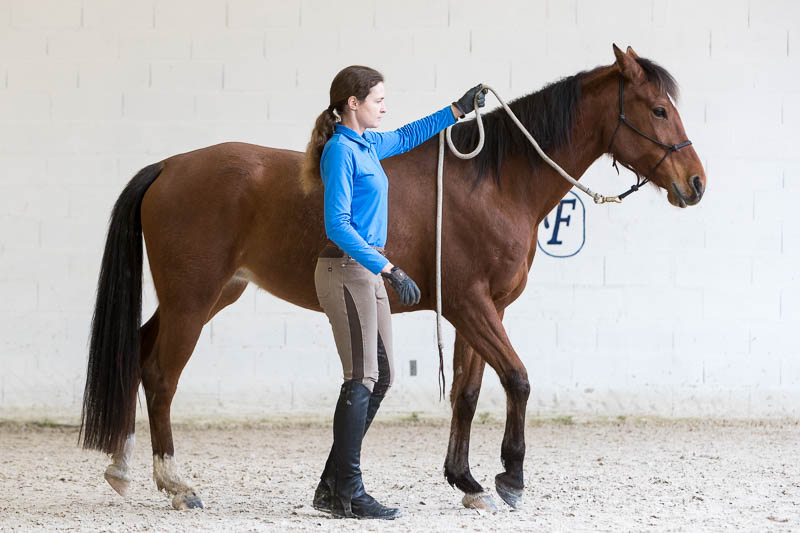
Objective:
The horse learns to back up by bumping the rope or one rein up and down (versus towards you) to move the halter.
The movement is very similar to that when dipping a tea bag—that’s where the name comes from.
Benefits:
You teach your horse another communication about slowing down.
Your horse will be less resistant to downwards transitions because you are using only one rein.
How to teach it to your horse:
Stand next to your horse, just behind the withers.
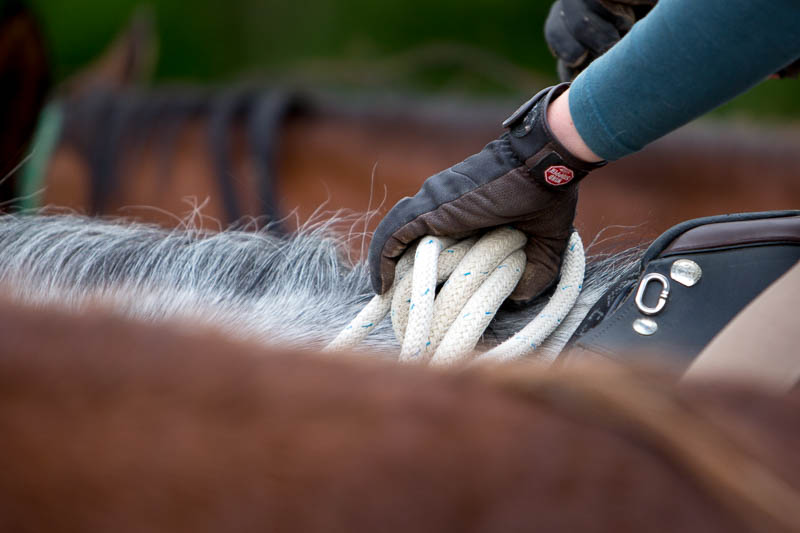
Fold the rope in half and lay it over the base of your horse's neck.
Lift the rope straight above the centre of your horse’s mane.
Start to bump the rope up and down - like a tea bag - in a rhythmical manner.
Again, use phases:
- Move the rope or one rein only, gently stroke the hair on the horses neck up and down
- the loop of the halter starts to move
- the halter moves
- now you bounce the clip of the rope more vigorously
Release as soon as your horse responds and repeat.
What if:
Your horse just turns his head.
Make sure that you are really lifting the rope straight up above the centre of your horse’s mane.
Take your stick in one hand to keep your horses nose straight.
Go through the phases slowly and clearly and only quit once your horse finds the correct response.
Exercise # 7: Lateral Flexion
This will be your emergency brake.
If you can bend your horses head and neck to one side, you can control him.
Trying to stop an out of control horse by pulling on two reins is usually not very effective.
When I ask the horse to bend his neck, his hind legs have to cross and he can no longer run.
I can also use Lateral Flexion to reconnect the horse with me in case it got worried.
As the horse can see the rider from this position, it is easy to refocus the horse's mind.
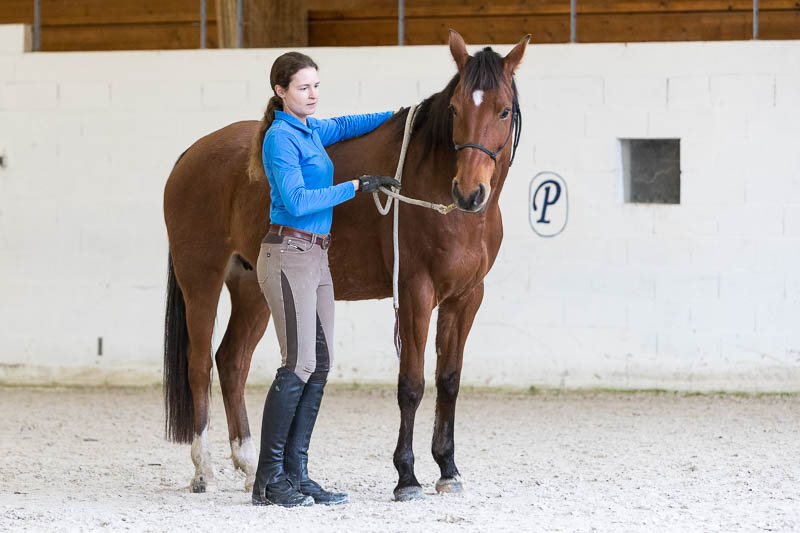
Objective:
The horse learns to flex his neck to one side by following the feel of halter and lead rope and bring his head around to your foot (when riding).
The horse learns to relax on cue and reconnect to the rider.
Benefits:
- you have reliable brakes also in case of emergency
- you have a tool to calm and reconnect your horse when it gets tensed and scared
How to teach it to your horse:
When asking Lateral Flexion on the left side of the horse:
- Position yourself next to your horse, just behind his withers.
- Fold the leadrope in half and lay it over the base of your horse's neck.
- Hold it with your right hand in place.
- Run your left hand down the rope until about 50 cm from the clip.
- Now take a soft feel on the nose of your horse.
- Move your hand away from the horse first, before drawing his nose to you.
- Very slowly close one finger after the other to slowly increase the pressure.
- Finally, hold firm and steady until your horse gives and bends the neck all the way.
- Release, reward and repeat until your horse follows the feel with lightness.
What if:
Your horse spins in circles:
Probably you have asked too fast.
Make sure to close your fingers very slowly and give your horse time to respond.
Try to feel the slightest effort of your horse.
Make sure to stay in position and to hold the rope as steady as a fencepost.
Your horse is very resistant:
Be very clear and persistent with your phases.
Don’t lose patience.
Most people have the patience for 30 sec, then they will give up or try something else.
Horses have much more patience. Hang in there and wait.
This position is uncomfortable enough, that the horse will look for a solution at one point.
You can call your horses name if things get really stuck, just to capture his attention.
Conclusion
With these 3 exercises, you have installed great and reliable communication with your horse.
The chances that he will understand you once you ride him, are a lot higher.
You have cleared out a big source of misunderstandings, stress and frustration on both sides.
Remember: The better your horse goes backwards, the better he will do everything else.
Related Articles
